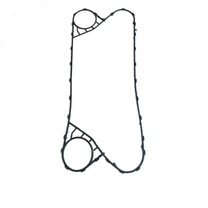
The correct sequence of plate installation after cleaning the plate heat exchanger
1. Use a tape measure to measure the size of the two splints of the product, and make a record (for the final assembly).
2. Disassemble the flanges of the plate heat exchanger and move them to the open ground. Open the drain outlet to release the remaining water in the heat exchanger.
3. When the water is exhausted, lay the plate heat exchanger horizontally (the flanged side is facing downwards), and then evenly loosen the bolts on the heat exchanger plywood, paying attention to symmetrical loosening and even force to avoid plates. Displacement or deformation occurs due to unequal pressure on both sides.
4. After all the bolts are loosened, first remove the top splint, and then take out all the plates one by one for cleaning. Be sure to pay attention to the position of the plate and the gasket:
4.1 The sealing gasket is placed for the sealing groove on the board. You must pay attention to the direction, especially the shape of the gasket. The trapezoidal or triangular side is placed upwards (all the sealing gaskets are placed in the same way)
4.2 Regarding the placement of the plates: The plates of the plate heat exchanger are exactly the same, except that after the gasket is installed, every other plane is rotated 180 degrees to place it.
5. Cleaning method: It can be cleaned manually or mechanically. It is recommended to use some cleaning agents (such as sulfamic acid cleaning solution or 5% by mass dilute hydrochloric acid + 8% B-125 corrosion inhibitor + 2% AP221 Surfactant combination cleaning solution) to clean off the dirt on the plates and gaskets, so as to avoid slippage or displacement during assembly, resulting in poor sealing performance. When cleaning by hand, be sure to use a soft brush dipped in cleaning fluid to clean. Be careful not to damage the plates and gaskets.
6. Assemble: Assemble the cleaned tracing tube cough-returning acupuncture membrane sheet and the sealing gasket in the order of the original disassembly, and clamp the clamping plate to the originally recorded size according to the method of disassembly. After tightening, the test is carried out at 1.25 times the working pressure to ensure that the plate heat exchanger does not leak.